It's "Turn Back Thursday" and nothing reminds me more of dinners at home in my mother's kitchen than her wonderful meatloaf. I've written about it before, and am posting the link below.
As I announced in my last post, I'll be re-posting recipes from the past five years while I write my cookbook! There's a treasure trove of great recipes that deserve a second look. Here's the first of many!
VIRGINIA O'FARRELL'S MEATLOAF
#TBT to my mother's meatloaf! Recipe, once again, right here!
http://adirondackbaker.blogspot.com/2012/12/sunday-and-my-mothers-meatloaf.html
Check back for more great re-runs and updates about progress with the cookbook! Speaking of which, I'm in the research phase right now. So exciting!
NOTE: If you have an especially favorite family recipe that you continue to make or enjoy, please share it with me for possible inclusion in the cookbook. In a couple of paragraphs, provide the story and tradition behind the recipe, and a few words about why it means something to you. A photo associated with the recipe or memory would be great (of the person who shared the recipe with you, of them and you, anything), and of course the recipe itself. I'll be testing recipes soon so get those recipes in and maybe you'll see your family's story and recipe in the cookbook!
Making the best of every day by embracing what matters most: Family. Friends. Food. Fun. And writing about it all!
Thursday, May 29, 2014
Tuesday, May 27, 2014
Change Is In The Air!
Dear followers of the Adirondack Baker Blog,
Yesterday marked five years since this blog's first post. It's quite a milestone, one that I've anticipated with a lot of thought about what this blog is, what it does, and how it serves its readers. It's been a wonderful experience, one I hope to build on in a very positive way.
Today I announce that I am formally starting to write my cookbook, an anticipated year-long project that will build on the foundation of 5 years of my ADK Blog, with the addition of tested recipes from contributors and other sources. This will be a narrative cookbook, where the story, family tradition, and history of a recipe take center stage, followed by the recipe itself. And there will be photos, lots of delicious photos. I have lots of ideas about how it will all take shape, and I promise that I will put my heart and soul into it!
You will continue to see posts from Adirondack Baker on my fb pages and linked on the blog itself, but they will be re-posts of favorite recipes and stories from the past five years. I hope you enjoy them again, or for the first time. I'll update you regularly on the progress of the cookbook project.
I'd love to have your support and encouragement (and recipes!) as I dive in head first! It's daunting and exciting. Stay tuned, it will be great to have you all along for the ride!
Thanks everyone!
Jeannie O'Farrell Eddy
Your Adirondack Baker!
adirondackbaker@gmail.com
http://adirondackbaker.blogspot.com
Monday, May 26, 2014
Half-a-batch of Chocolate Chip Cookies!
...for when you want to feel only a little guilty
(makes 20)
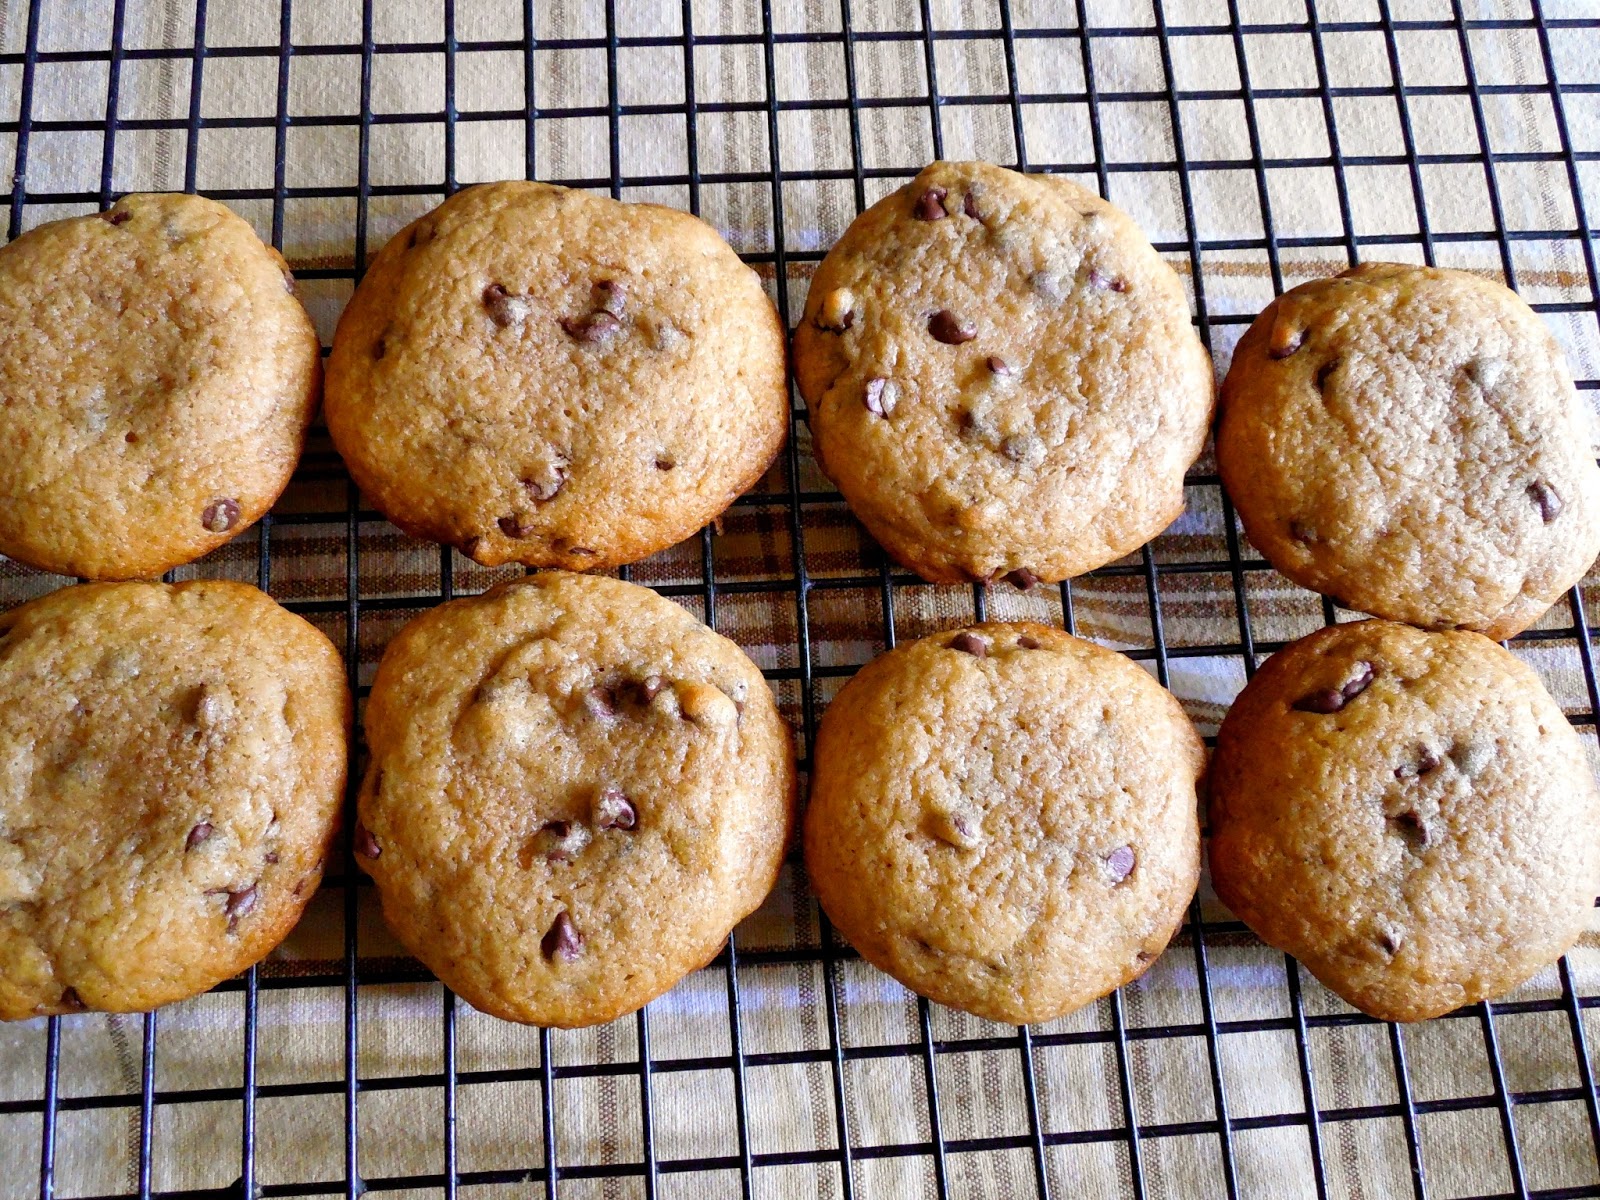
This morning Pete and I made half a batch of chocolate chip cookies. Half a batch for a number of reasons - first, if we had a whole batch, we'd eat a whole batch. Second, I only had enough brown sugar for half a batch. Third, I had to borrow a cup of chocolate chips from Katie. That made it pretty simple - a half a batch it was.
This recipe uses melted butter. I melt the butter and brown sugar together. I think it makes for a great cookie - crisp on the outside, soft and chewy on the inside. It comes together in just a few minutes. I chill the dough in the fridge for a while and then stir the chocolate chips in to the cold dough, since it's too warm when it's just mixed and the chips would melt and not keep their shape.
When you want to make chocolate chip cookies but don't want a ton of them, make this half-batch and enjoy them while you can!
HALF-A-BATCH CHOCOLATE CHIP COOKIES
Preheat oven to 375 degrees Farenheit
Line a cookie sheet with parchment paper (buy some if you don't have any - one of the most useful kitchen tools you'll ever use).
Step one: Melting
1/2 cup butter
3/4 cup brown sugar, packed (I only use brown sugar, no white)
In saucepan over medium heat, stirring often, melt butter with brown sugar until it's completely melted.
Pour butter/brown sugar mixture into a mixing bowl. To that, mix in 1 teaspoon vanilla extract. Add one egg, mixing well.
Add dry ingredients:
1 cup plus 2 tbsp. all purpose flour
1/2 teaspoon baking soda
1/2 teaspoon salt
Mix on very low speed until the dry ingredients are completely incorporated.
Place bowl with batter in the fridge for 15 minutes or so.
Stir in: one cup (6 oz. by weight) semi-sweet chocolate chips. I used mini since that's what Katie had.
Drop by generous teaspoonfuls onto parchment paper. Bake 8 minutes until the edges start to brown but the tops are still light.
Final note: here's a photo of my Dad, Val O'Farrell, taken March 12, 1945 on the island of Oahu in Hawaii. He's on the left and his buddy Randy Mantooth is on the right. They were serving in the Army after Pearl Harbor. I love this photo.
| I love seeing my Dad's handwriting again... |
God Bless Our Troops, all who have served and all who serve. This Memorial Day 2014 is in honor to them all.
Sunday, May 11, 2014
Buttermilk Banana Walnut Muffins for a Crowd!
| Cooling on my King Arthur Flour folding rack! A favorite kitchen tool! |
When we visited, Henry (six years old) had very exciting news to share with "Grammy" Eddy - he's lost his first tooth, just last night! He was very proud to show his great-grandma this recent development. It is a big deal in his young life!
It was great that my kitchen (and I!) had the day off! But, when my kitchen is busy, it's VERY busy! I don't usually bake in small quantities. Most of the time, I make batches by the dozens. This recipe for Buttermilk Banana Walnut Muffins is one that I make in large quantities all the time. The buttermilk ensures a light, tender muffin with a high rise. Chopped walnuts inside and sprinkled on top add a nice nuttiness and as well as a healthy boost. With half the sugar compared to other muffin recipes, this muffin is sweet enough when paired with ripe, mashed bananas. It also freezes very well so go ahead and make a big batch, take some to work, give some away, and keep some out for a great start to your day or as a not-so-guilty snack during the day!
BUTTERMILK BANANA WALNUT MUFFINS
Makes 24 (half the recipe for one dozen)
Preheat oven to 375 degrees Farenheit. Get two big bowls out.
Spray muffin tins with cooking spray or line with paper liners
Ingredients:
4 1/2 cups all-purpose flour
1 cup sugar
4 teaspoons (or 1 tablespoon plus one teaspoon) baking powder
2 teaspoons baking soda
1 teaspoon salt
4 bananas
2 cups buttermilk (or, 4 tablespoons vinegar plus enough milk to make two cups total, let sit for 5 minutes)
2 eggs, beaten
1/2 cup melted butter
2 teaspoons vanilla extract
1 cup chopped walnuts plus more for sprinkling on top.
Directions:
In large bowl, whisk together flour, sugar, baking powder, baking soda, and salt. Set aside.
In another large mixing bowl, mash four bananas. I do this with a whisk attachment. To the mashed banana in the bowl, add and mix in buttermilk, beaten eggs, melted butter, and vanilla.
Pour liquid banana mixture into dry ingredients in the other bowl. With a rubber spatula or wooden spoon, fold wet and dry ingredients together until all dry particles have been incorporated and there are no more pockets of the flour mixture. Fold in walnuts.
With an ice cream scoop or 1/4 cup measure, drop batter into prepared muffin pans. Sprinkle top of batter in muffin tins with crushed walnuts (see photo). Bake for about 20 minutes or until tops are dry and bounce back when pressed lightly.
Cool in pans on wire rack for about 20 minutes. Remove from pan and allow to cool completely.
Wednesday, May 7, 2014
Yukon Gold and Roasted Sweet Potato Salad
![]() |
| So pretty before it all got tossed together! |
Here's a recipe you might just love! It's quite a departure from a traditional potato salad, with the colorful addition of sweet potatoes, and a dressing made with more Greek yogurt than mayonnaise. The inspiration for this recipe is a salad my daughter Meghan shared with me, one that is made at the restaurant where she works. I loved the flavors and the lightness of it all. If you want to incorporate a boatload of healthy ingredients into a cool and creamy summer salad and still feel as though you're indulging, this potato salad is for you (and your happy friends!).
YUKON GOLD & ROASTED SWEET POTATO SALAD
2 bags of the small Yukon Gold potatoes (about 4 lbs. total), unpeeled
2 sweet potatoes, peeled
¼ of a small red or sweet onion, finely chopped
zest of half a lemon
one half to one cup chopped Kale (I just used the fringy
outer leaves)
Dressing:
1 cup plain Greek yogurt
¼ cup mayonnaise
2 tablespoons stone-ground mustard
2 tablespoons lemon juice
1 tablespoon sugar
salt and pepper to taste (I didn't add any!)
Boil the Yukon Gold potatoes just until fork tender (about
20 minutes). Drain. Allow to cool.
Roast the sweet potatoes: cut in ½-inch slices and toss in a
couple of tablespoons olive oil. Place on cookie sheet (I lined mine with
parchment paper) and bake in 425-degree preheated oven for 20 minutes, turning with
a spatula at 10 minutes.
Allow to cool.
Cut potatoes in fourths (both the Yukon gold and the sliced
sweet potatoes). Place in a large bowl. Add chopped onion, lemon zest, and
chopped kale.
Make dressing: whisk together Greek yogurt, mayonnaise,
mustard, lemon juice, and sugar.
Pour dressing over potatoes and the other ingredients in the
bowl and toss lightly.
Chill, and then chill with your friends!
Tuesday, April 22, 2014
Blueberry Lemon Trifle for Spring and Summer Desserts!
Perhaps it's the same where you live - after the longest and coldest winter in recent memory, we are so ready for warmer weather here in upstate New York! This past Easter weekend, we were blessed with warm days and sunny skies. To help celebrate spring and the promise of warmer days, I decided to make an Easter dessert that reflected all the lightness and cheer of a new season - a blueberry lemon trifle. Part of the incentive was a trifle dish my friend Kim gave me for my recent (BIG) birthday(!). Another motivating factor was extra layers of lemon cake waiting in my freezer to be turned into something wonderful. I had a bag of frozen blueberries, a box of vanilla pudding mix (six serving, cooked not instant) and a big container of Cool Whip. Cool Whip is not something I buy regularly, preferring by far home-made whipped cream, but for ease of preparation and stability, I had that Cool Whip thawed and ready to go!
This would be a great dessert for any spring or summer brunch or dinner, but I'm thinking it could be especially lovely for Mother's Day.
Here's how it all came together:
BLUEBERRY LEMON TRIFLE
Ingredients:
1 2-layer baked cake, lemon (home made or mix)
6-serving Vanilla pudding mix, cooked style
3 cups milk for the pudding
1 cup sugar
2 cups water
1/4 cup cornstarch
2 cups frozen blueberries
Large container Cool Whip, thawed
Early in day or day before, make cooked pudding according to package directions. Cool. Chill in fridge until ready to use.
Make blueberry compote:
In medium saucepan, stir together:
1 cup sugar
1/4 cup cornstarch
Add:
2 cups water, whisk well until completely blended.
Stir in 2 cups frozen blueberries. Bring to a full rolling boil, stirring often, and then continue to boil for two more minutes until quite thick.
Cool and set aside. Chill in fridge until ready to use.
Getting ready to assemble trifle:
cooked vanilla pudding
large container of Cool Whip
To the vanilla pudding, fold in 1/2 the container of the Cool Whip until well combined.
Cut lemon cake layers into chunks, about 1 1/2-inch in size.
Into trifle dish, layer ingredients using about a third of each ingredient per layer, starting cake chunks, then blueberry sauce, pudding mixture, and layer of straight Cool Whip. Repeat layers until you get to the top, finishing with pudding mixture and a fluffy crown of Cool Whip (see photo). Garnish with a tiny bit of blueberry sauce and a lemon slice.
Chill. Bring to the table, and spoon into serving dishes.
Sunday, April 13, 2014
Orange Almond Chocolate Biscotti YOU Can Make!
YOU can make biscotti. It's not difficult at all! Just takes a little time. The dough comes together quickly and easily. It gets shaped into a loaf which is baked. The baked loaf cools a bit and is divided into a dozen half-inch slices which are baked again and you end up with firm, crispy servings just waiting to be dunked into a steaming hot cup of coffee.
This recipe was inspired by one I found in Ellie Krieger's cookbook, The Food You Crave. Ellie takes our favorite foods and healthies-them-up. I love her and all her recipes. Anyway…this recipe uses whole wheat flour along with all-purpose, uses olive oil, has relatively little sugar, as well as the healthy additions of sliced almonds and fresh orange zest. Dark chocolate rounds out this biscotti, which is a perfect compliment to the orange.
This is my first attempt at biscotti, and it came out great. Try it and let me know what you think! (As always, make it your own with whatever flavors, add-ins appeal to you!)
ORANGE ALMOND CHOCOLATE BISCOTTI
adapted from Ellie Krieger's recipe
Preheat oven to 350 degrees Farenheit
Line a cookie sheet with parchment paper (seriously, if you don't have it, go get it!)
Ingredients:
1 1/4 cups all-purpose flour
1 1/4 cups whole wheat pastry flour or whole wheat flour (I used King Arthur's Whole White)
1/2 cup sugar
1 1/2 teaspoons baking powder
1/2 teaspoon salt
2 eggs
1/4 cup olive oil
1/3 cup orange juice (fresh or otherwise)
1 teaspoon vanilla extract
1/2 teaspoon orange extract, if you have it
1 generous tablespoon freshly zested orange rind
2 ounces dark chocolate, chopped (I used semi-sweet morsels and chopped them up a bit)
1/2 cup sliced raw almonds
Directions:
In medium mixing bowl, whisk together dry ingredients.
In large mixing bowl, whisk together eggs, olive oil, orange juice, vanilla extract, orange extract, and orange zest.
Gradually add dry ingredients, a bit at a time, into wet. Mix on low speed until the dough comes together. (I added orange juice to the recipe for this reason - it didn't come together without the added moisture.)
With your hands, blend in almonds and chocolate.
Turn dough out onto floured surface. Knead a few times. Shape dough into a loaf, 10x3 inches. Place loaf on parchment-lined cookie sheet.
Bake 25 minutes.
Remove from oven and cool pan on wire rack for 15 minutes.
After 15 minutes, with sharp, serrated knife, gently but firmly slice loaf on the diagonal in 1/2-inch thick slices, being careful to keep slices intact.
Bake slices for 10 minutes. Turn slices over and bake for another 5-10 minutes (I went for 10).
Remove from oven and allow sliced biscotti to cool on wire rack.
These biscotti keep well for a week in a covered container, if you let them! After just a few minutes out of the oven I brought a few slices downstairs to Katie, Bill, and Meghan, who were enjoying hot cups of coffee from their new fancy-schmancy Breville coffee maker from Bed, Bath, and Beyond (which grinds the beans right in the coffee maker!), and they were very happy to put this biscotti to the test. They loved it!
Here are photos of the biscotti coming together:
| Dough with almonds and chopped chocolate |
| Shaped and ready for the first baking... |
| Half-baked! |
![]() |
| Sliced and ready to go back in the oven! You can see it's still doughy in the middle, which is fine. |
| BISCOTTI! |
Subscribe to:
Posts (Atom)